This article is not viewable in your language. Please check back at a future date.
This article's translation was completed by machine translation. Please forgive any possible errors.
While EXP STEM Lab Units were designed for the VEX EXP Kit and follow the Learn - Practice - Compete format, there are many ways to teach these STEM Labs with your V5 Kit. In this article, we provide you with resources to help adapt EXP STEM Labs, giving you the flexibility to teach both V5 and EXP STEM Lab Units.
To see how to incorporate both EXP and V5 STEM Labs together in your classroom, see this V5 Cumulative Pacing Guide.
Overall Considerations When Teaching EXP STEM Lab Units with V5 Kits
V5 robots have a larger footprint than EXP builds. When creating the practice and challenge fields, you may need to increase the size of the field so a Clawbot or Speedbot has enough space to navigate. There will be recommendations for larger field sizes for each unit below. These can be created either using VEX V5 Field Tiles or by using tape on a floor of the same size.
Introduction Lesson
Lesson 1 in each STEM Lab Unit covers an introduction to the competition at the end of the Unit as well as checking battery levels on the Battery and Controller and preparing to use VEXcode EXP. Use the articles below to learn how to check the V5 Battery levels and prepare to use VEXcode V5.
The following section identifies an EXP STEM Lab, the EXP build that is used for that Unit, and a compatible V5 Build that you can use to complete the practice and challenge activities. Also included are suggestions for adapting the competitions within each Unit.
Team Freeze Tag
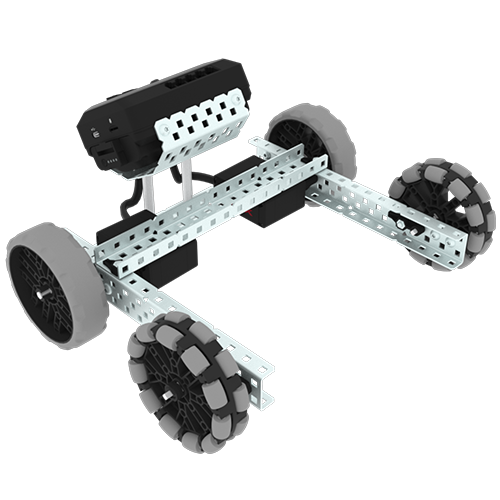
In this Unit, you will drive the BaseBot using the Controller, choose wheels, and add sensors to compete in the Team Freeze Tag competition! See the Team Freeze Tag Unit here.
| EXP Build |
Recommended V5 Build |
Adaptations |
BaseBot

|
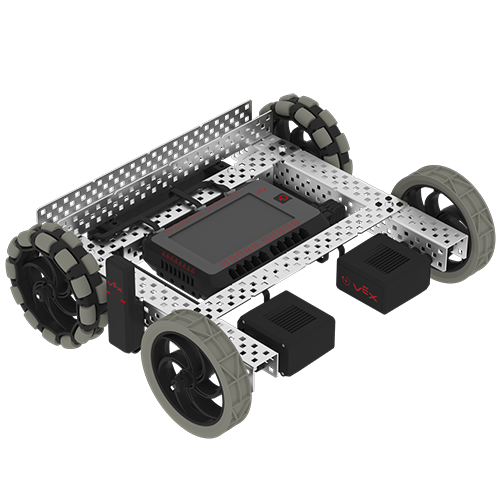
Speedbot

|
- For all activities, it is recommended to use a 6' by 8' (~180cm by 240cm) Field so the robots have more room to navigate.
- All activities that use Buckyballs can be replaced with other circular game elements or classroom objects of roughly the same size (4in/10cm in diameter).
- Lesson 3: V5 Starter Kits come with two wheel types (Omni and 4" Travel wheels). Use these in the Practice activity.
- Lesson 4: Add a c-channel to the front of the robot to help with tagging. The Bumper Switch can be mounted on the back of the robot on the c-channel above the Battery.
|
Robot Soccer
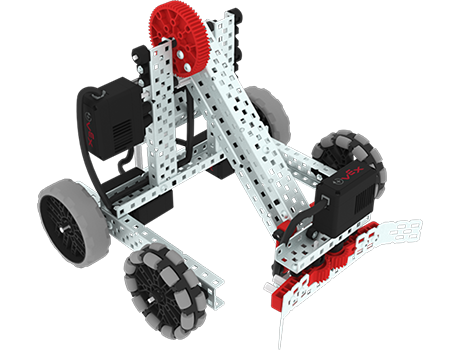
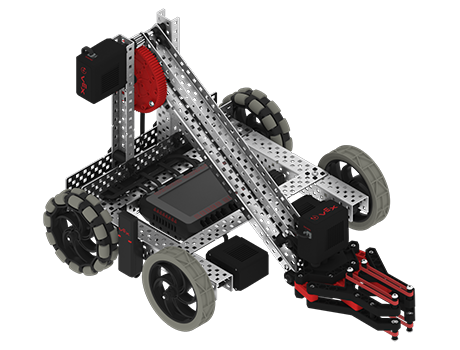
In this Unit, you will explore how to create a manipulator on your robot to grab, pass, and score the most goals as a robot soccer player in the Robot Soccer competition! See the Robot Soccer Unit here.
| EXP Build |
Recommended V5 Build |
Adaptations |
Clawbot

|
Clawbot

|
- All activities that use Buckyballs can be replaced with other circular game elements or classroom objects of roughly the same size (4in/10cm in diameter).
- Lesson 3: For the practice and challenge activities, it is recommended to use a 4' by 6' (~120cm by 180cm).
- For the Robot Soccer Competition, it is recommended to use a 6' by 8' (~180cm by 240cm) Field so the robots have more room to navigate.
|
Up and Over
In this Unit, you will explore how to design a Clawbot to collect, pick up, and move Buckyballs from one side of the Field to the other in the Up and Over competition! See the Up and Over Unit here.
| EXP Build |
Recommended V5 Build |
Adaptations |
Clawbot

|
Clawbot

|
- For all practice and challenge activities, it is recommended to use a 4' by 6' (~120cm by 180cm) Field.
- All activities that use Buckyballs can be replaced with other circular game elements or classroom objects of roughly the same size (4in/10cm in diameter). These can also be replaced with square game elements to stack rather than stacking a Buckyball on a ring.
- Lesson 4: To create the barrier you can use extra metal from the kit or other classroom materials like cardboard. The barrier should be 4-5 inches (~10-12cm) tall and span the width of the Field.
- For the Up and Over Competition, it is recommended to use a 6' by 8' (~180cm by 240cm) Field so the robots have more room to navigate.
|
Castle Crasher
In this Unit, you will explore how to use the Optical and Distance sensors to seek, crash, and clear Buckyball ‘castles’ to score points in the Castle Crasher competition! See the Castle Crasher Unit here.
| EXP Build |
Recommended V5 Build |
Adaptations |
BaseBot

|
Speedbot

|
- For all practice and challenge activities, as well as the Castle Crasher Competition, it is recommended to use a 4' by 4' (~120cm by 120cm) raised Field.
- You may want to increase the size to 5' by 5' (~150cm by 150cm) so the robots have more room to navigate the Field.
- All activities that use Buckyballs can be replaced with other circular game elements or classroom objects of roughly the same size (4in/10cm in diameter). These can also be replaced with square game elements to stack rather than creating stacks of Buckyballs.
- Lessons 3 and 4 provide recommended mounting positions for the Distance and Optical Sensors. Add a C-Channel to the front of the Speedbot to use as the mounting location for the sensors.
|
Treasure Hunt
In this Unit, you will build and code the Clawbot with the Optical Sensor to recognize and collect red Buckyballs to compete in the Treasure Hunt competition! See the Treasure Hunt Unit here.
| EXP Build |
Recommended V5 Build |
Adaptations |
Clawbot

|
Clawbot

|
- For all practice and challenge activities, as well as the Treasure Hunt Competition, it is recommended to use a 3' by 5' (~90cm by 150cm) Field with one wall removed from the far end to create an opening for the 'Home Zone.'
- You may want to increase the size to 4' by 6' (~120cm by 180cm) so the robots have more room to navigate the Field.
- All activities that use Buckyballs can be replaced with other circular game elements or classroom objects of roughly the same size (4in/10cm in diameter).
- You should have two objects that are red and six of another color.
|
Ring Leader
In this Unit, you will explore the difference between driver control and autonomous movement, as you use multiple programs (autonomous and driver control) in order to score rings on different sized posts in the Ring Leader competition! See the Ring Leader Unit here.
| EXP Build |
Recommended V5 Build |
Adaptations |
Clawbot

|
Clawbot

|
- For all practice and challenge activities, as well as the Ring Leader Competition, it is recommended to use a 3' by 5' (~90cm by 150cm) Field with various size posts attached.
- The posts are created using C-Channels connected together. You can use the following details to recreate the posts with your V5 Kit or to create posts of similar heights using other classroom objects.
- The small post is a 1x2x1x8 C-Channel attached vertically to the Field (approximately 100mm tall).
- The medium post is a 1x2x1x8 C-Channel and a 1x2x1x12 C-Channel attached vertically to the Field (approximately 250mm tall).
- The large post is two 1x2x1x8 C-Channels and a 1x2x1x12 C-Channel attached vertically to the Field (approximately 350mm tall).
- All activities that use rings can be replaced with other circular game elements or classroom objects of roughly the same size (4in/10cm in diameter) with a center hole to place on the posts.
|
Platform Placer
In this Unit, you will explore manipulator design, including lifts, to drive your robot to place rings and Buckyballs on platforms of various heights to score points. In the Ring Leader competition, teams will join together to develop game strategy for a two robot team to try to win the competition! See the Platform Placer Unit here.
| EXP Build |
Recommended V5 Build |
Adaptations |
Clawbot

|
Clawbot

|
- For practice and challenge activities for Lessons 2 and 3, and the practice activity for Lesson 4, it is recommended that you use a 4' by 4' Field with walls (approximately 120cm by 120cm) with platforms attached.
- For the challenge activity for Lesson 4, it is recommended that you use a 4' by 6' Field with walls (approximately 120cm by 180cm) with platforms attached.
- For the Platform Placer Competition, it is recommended that you use a 6' by 6' Field with walls (approximately 180cm by 180cm) with platforms attached.
- The platforms are created using any additional metal pieces from the Kit and Field Tiles. You can use the following details to recreate the platforms with your V5 Kit or to create platforms of similar heights using other classroom objects.
- The medium platform is recommended to be raised approximately 20cm or 8in off the Field.
- The high platform is recommended to be raised approximately 40.5cm or 16in off the Field.
- All activities that use rings can be replaced with other circular game elements or classroom objects of roughly the same size (4in/10cm in diameter) with a center hole.
|